Product Design & the Engineering Design Process
Explore a real-world design problem that is solved through implementing the engineering design process. Go into the step-by-step details of the engineering design process and the many ways different organizations apply those steps in product design.
Introduction
People describe the past several decades as the information age or technology age. With easy internet access and abundant high-speed communication tools, it seems like so many businesses and products, such as NFTs or non-fungible tokens, mark a dramatic change from a physical manufacturing world to a virtual, digital one.
While the world may be more information-centric, the digital world cannot exist without a physical one, and manufactured goods such as computers, smartphones, video game consoles, and electronics are the backbone of the digital age’s body. Beyond the manufactured goods that are needed to support the digital world, people still have needs for material things and products. Look around your school and home, and you’ll see furniture, cooking utensils, hardware, and even the buildings you are in. Many of these products were made using advanced manufacturing.
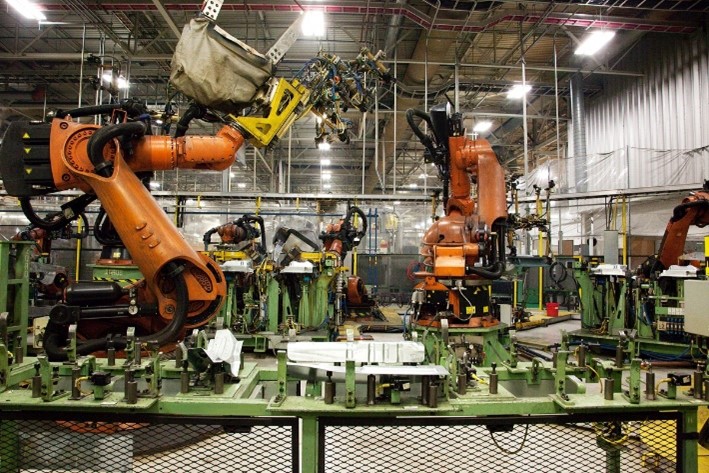
Figure 1: International car manufacturing plant in Tuscaloosa County, Alabama
Engineering Design Process
Since the dawn of the information age, we’ve witnessed technological innovation unlike what anyone could have predicted. We’ve also seen a huge change in manufacturing processes and practices that make use of these new Industry 4.0 technologies.
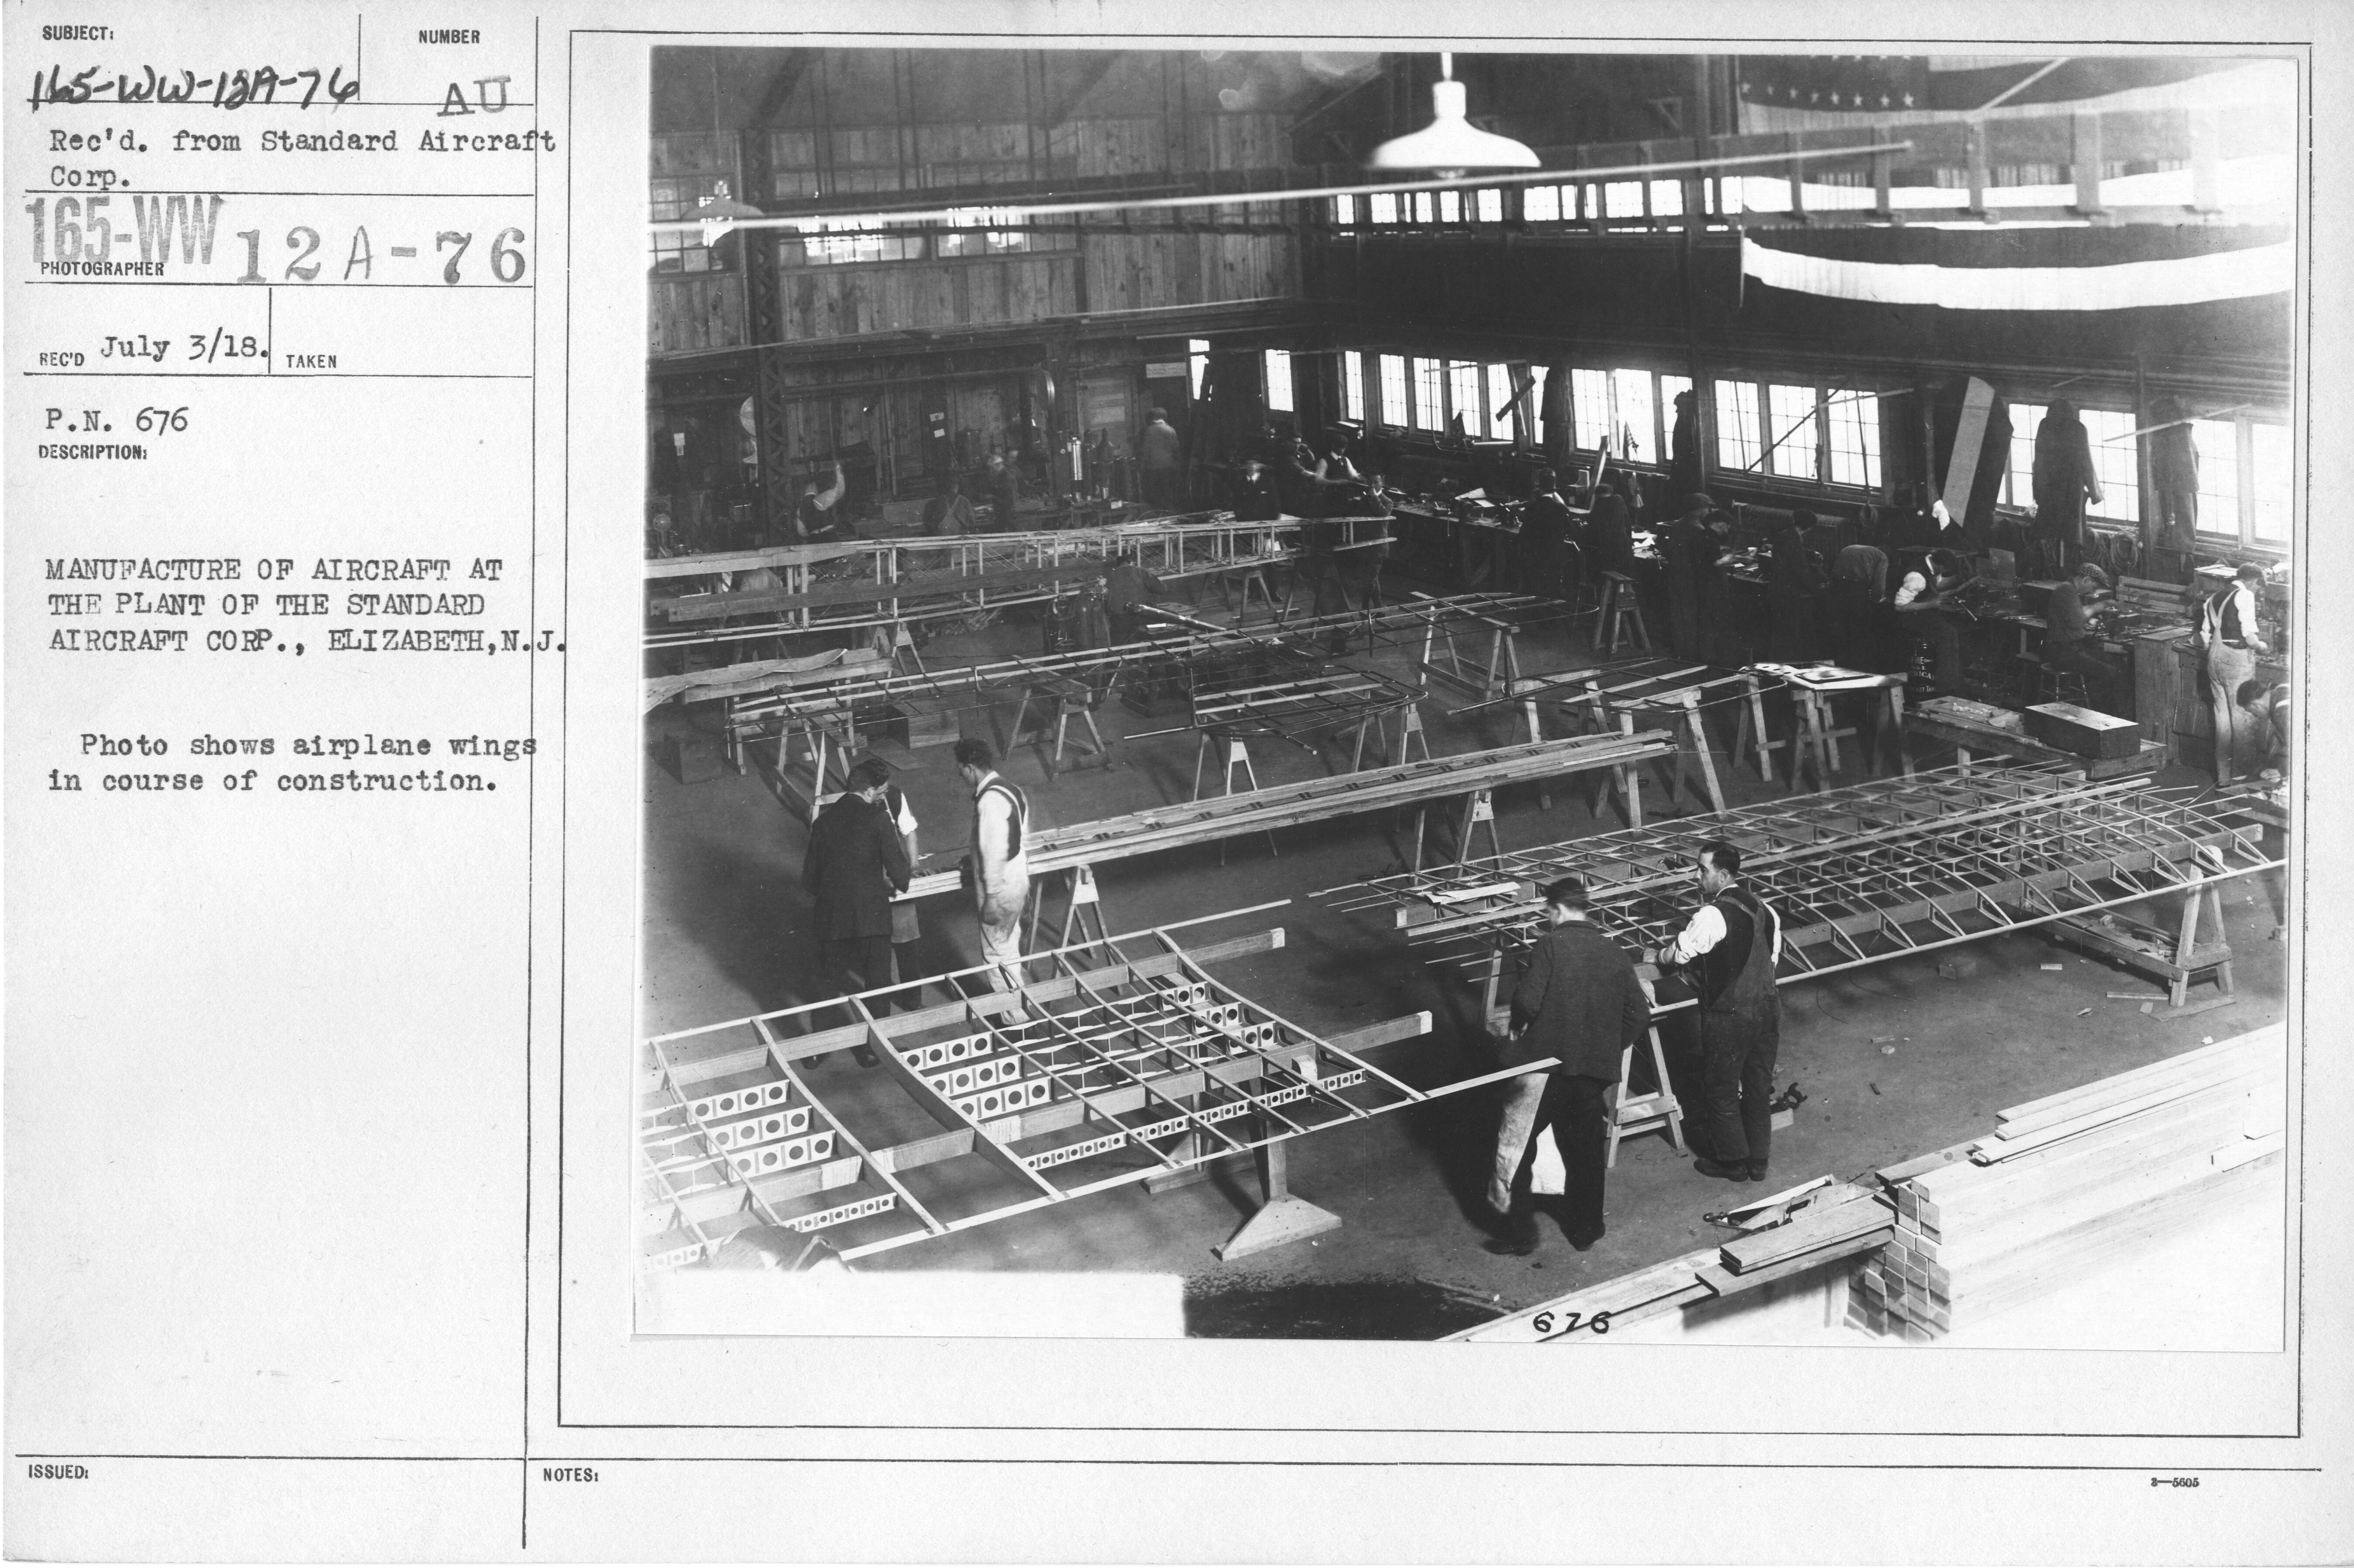
You may be familiar with the engineering design process from your previous science or CTE coursework. The process has historically been presented as a linear and very time-intensive process. An idea is formed, a design is drawn, a prototype is made and tested, and the product is manufactured. In the past, this process could be described as being “linear” or in a straight line. Essentially, one step would be followed by another in a prescribed order. Because of the efforts that went into each step, small modifications to the design based on the prototype were difficult to implement. Frequently, the product would be manufactured based using only the original specifications and any modifications would be made only after the product was already in production. This would lead to a tremendous amount of retooling and waste of resources. Many times it took years to move a product from idea to production.
Figure 2: Aircraft Manufacturing During World War I
Technological innovation and Industry 4.0 tools launched the era of advanced manufacturing. The ability to create digital designs and troubleshoot them with digital testing meant that design improvement could happen without wasting time and effort manufacturing a product only to then find a design flaw. Because of this ability to design, test, redesign, and test in a digital environment. The engineering design process has become more circular in structure and dynamic, allowing for an infinite number of paths or iterations through the process, resulting in more efficient, cost-effective, and safe manufacturing processes.
The Four Basic Phases
There is no singular established series of steps in the engineering design process. Some models have four steps, and some have ten! Regardless of how many steps the process you use has, you’ll still go through four basic phases: learn, plan, create, and test.
- Learn Phase: In the learn phase, you will generate an initial idea that solves a problem or addresses a need by conducting research. You’ll explore previous solutions, interview people and organizations affected by the problem or need, and identify customer requirements.
- Plan Phase: During this phase, you’ll create preliminary models of the design and create a timeline for how you plan to do all of the remaining steps. You’ll create drawings—either by hand or using computer aided drafting (CAD) software— for your new product. You may even set some goals, parameters, and product specifications for your product design, such as planning fatigue testing, cost to build, and integrating environmentally friendly manufacturing practices.
- Create Phase: This is the phase that many innovators are most excited to begin. It’s the phase where you start to build your design physically. This may be with a 3D printer or by hand. The first model of the product you create is your prototype; the etymology of this word means “original form.”
- Test Phase: Here you’ll test the functionality, durability, and other characteristics of your prototype to ensure that it functions as you intended. Then, you’ll consider ways in which you could improve your product's design.
It might be natural to envision this process as circular. You start with the first phase and move your way through all four phases. However, that’s not always the case. After you have identified the problem and started to research what products are already on the market, you may come to realize that there’s no longer very much use for your initial product idea.
For example, you may have had a great idea for a windproof umbrella and then realized that your idea already exists. At this point, you can then choose to start over with a new idea or stick with your original idea but do more research to consider how you can improve upon the existing design.
Or, you may have reached the planning phase of the engineering design process and realized that the costs of the materials needed would be too expensive, so you return to the learn phase to find out about other potential materials.
What's most important to keep in mind is that the engineering design process is not linear, or one step after another. It's dynamic or iterative. You can loop back to an earlier phase in the design process at any point.
National Aeronautics and Space Engineering (NASA) Engineering Design Process
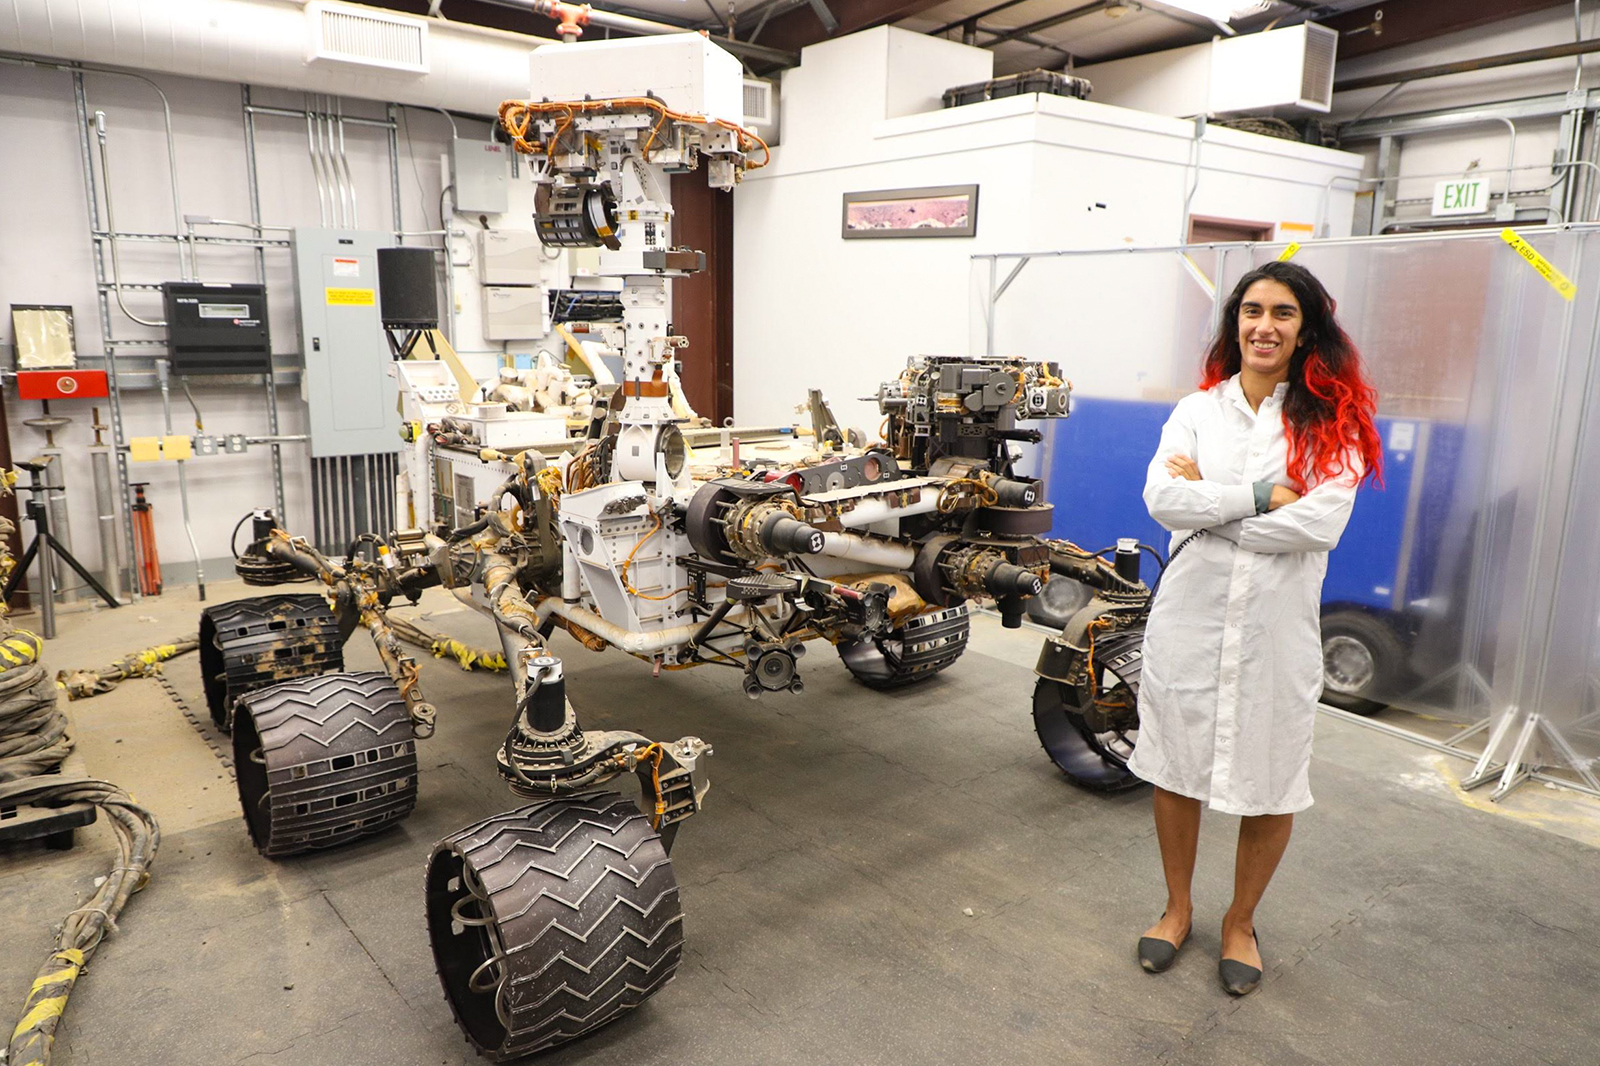
Figure 3: A systems engineer at NASA's Jet Propulsion Laboratory, Farah Alibay poses with an Earth-based version of the Mars rover Curiosity that engineers use to test maneuvers and drives for the Red Planet
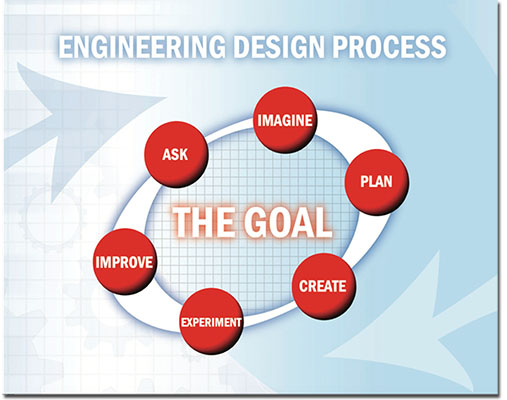
NASA personnel also use an engineering design process when creating technology for space exploration. When NASA BEST (Beginning Engineering, Science, and Technology) personnel work with students, they have a specific engineering design process they share. They break the 4 basic phases into additional, more specific steps and include additional details.
Here are NASA's steps:
Figure 4: NASA Engineering Design Process
Web Link - NASA's Engineering Design Process
Table 1: Comparison of Engineering Design Process Phases and Steps
|
|
|
|
Learn |
Ask |
Identify the problem, requirements that must be met, and constraints that must be considered. |
|
Imagine |
Brainstorm solutions and research ideas and identify what others have done. |
|
|
Plan |
Plan |
Choose two to three of the best ideas from their brainstormed list and sketch possible designs, ultimately choosing a single design to prototype. |
|
Create |
Create |
Build a working model, or prototype, that aligns with design requirements and that is within design constraints. |
|
Test |
Test |
Evaluate the solution through testing; they collect and analyze data and summarize the strengths and weaknesses of their design that were revealed during testing. |
|
Improve |
Based on the results of their tests, they make improvements on their design, identify changes they will make, and justify their revisions. |
When you're using the engineering design process to make a product, you'll be able to choose which specific steps and tasks you'd like to have as part of your process. The process used is very dependent upon the type of product you are designing.
Breaking Down the Steps with Toto
At the heart of the engineering design process is solving a problem or meeting a need. Before you make any efforts to design a product to manufacture, you should be considering how this particular product will solve a problem or meet a need for consumers. Does it help with home organization? Does it keep your bike safely locked? Does it help foods cook more quickly? Does it help gamers avoid finger and wrist pain during play?
Let's take a look at a real-world problem and consider how one might use the steps of the engineering design process to solve it.
Meet Toto:
Figure 5: Toto the Yorkshire Terrier
Toto is a two-year-old Yorkshire Terrier who once had a bad experience on a cross-country car ride. The family that adopted her has found that it's incredibly difficult — if not impossible — to take her anywhere in the car. She panics, pants heavily, and gets sick. They've spoken to their veterinarian who said that there is nothing physically wrong with her, so they just have to continue to work to find a way to make Toto more comfortable during rides.
Figure 6: Toto the dog feeling unwell after a car ride
Toto's family is looking for some help with this problem. So let's go through the engineering design process to see if we can build a solution for them. We'll explore each phase of the engineering design process by going through NASA's process steps. We'll then ask guiding questions to help us move through the process.
Step 1: Ask
(Identify the problem or need and ask questions to empathize with those affected by the problem)
- What is the problem to be solved or the need to be addressed? Toto does not like to ride in the car.
- Who is affected by the problem or need? Toto's family and Toto.
- How does the problem or need affect them? They are unable to take her places without Toto feeling afraid or sick.
During this step, you really focus on the problem or need and the way it affects your future customers. It's important that you clearly state the problem or need and listen to those affected to learn more.
But remember, your future customers are not just Toto's family. You must think broadly about how others might find the product to be useful. It's important to reach out to dog owners and discuss how their dogs are negatively affected by car rides.
In this case, after speaking with Toto's family and others who have car-averse dogs, you learn that the dogs tend to get upset when they're too confined and can't see out of the window. In Toto's case, you observe that she's also very tiny and could not lift her head to the window height even if she weren't inside of a carrier.
Many dog owners also described how turns and bumps in the road upset their dogs, too. It seems that many of the dogs are motion-sensitive.
Step 2: Imagine
(Brainstorm ideas and research about the topic and what others have done to solve the problem)
- Does it already exist? There are many dog carriers that can be used in the car.
- What needs to be improved in the marketplace? The dog carriers on the market tend to be enclosed where the dogs cannot see out of the window. They also do not have the ability to absorb motion.
- How does it work? It would be raised, secured to the seat, and have "earthquake technology" where the frame has built-in motion minimizers.
- Does it have restrictions for use? There should be multiple sizes for dogs of different sizes. It will only work up to certain weights.
- Are there safety considerations? Yes, the dog must not be able to chew through it, and the dog must also wear a harness and be secured to the seat.
After doing a little bit of research into existing products, you realize that there do not seem to be products on the market that address the underlying problem: motion sickness. You recall reading an article about how buildings in some areas are designed with large rollers to protect them from movement caused by earthquakes and you think that this could be part of your solution. Perhaps you could create a base for your product that includes rollers to absorb the movement of the car seat!
Learn more about earthquake rollers in the article Web Link - Earthquake Rollers: An earthshaking science activity .
Step 3: Plan
(Choose one or more ideas, sketch designs, consider constraints, create a timeline for subsequent steps)
- Which idea(s) would you like to develop? A raised car seat with built-in anti-movement roller technology based on the type used with building earthquake design.
- Are there any safety or environmental regulations to follow? Dogs must be secured in a carrier, crate, or harness while in a car. The materials must be non-toxic for animals.
- What features are non-negotiable? It should be soft with no sharp edges and must be secured in the back seat of the car. It must also be raised so that the dogs can see out of the window. It should be relatively lightweight for portability.
- What materials should you use? It should have a very soft cotton pillow for comfort and a strong, aluminum interior frame so that it does not collapse.
- How will you draw your designs? AutoCAD
You've decided to move forward with your roller design, so you start to think about the constraints. There are a lot of national and local regulations about pet products, so you have a lot of homework to do to make sure that your product is fully compliant.
Step 4: Create
(Building the prototype)
- How will you build the prototype? After some initial sketches in your engineering journal, you use AutoCAD to create the initial design. You'll then start to source your materials.
- How will the materials be joined? You know that since some of the materials are fabric, you'll need to sew those. The aluminum frame will be soldered at the corners. The rollers in the base will not be attached.
You're excited to actually see your design in 3D! After gathering your materials, you start to assemble your product.
Step 5: Test
(Brainstorm ideas and research about the topic and what others have done to solve the problem)
- Does it work as expected? No, there was still too much movement with the roller design.
- Is it durable? Not enough. Toto chewed the corners of the car seat.
- What do potential consumers think? Toto's family loved the design and said if some of the design issues are solved, they would certainly buy it.
Unfortunately, the testing did not go as planned. The earthquake rollers didn't minimize movement enough, and Toto chewed through the car seat. She also had a little accident, and the seat could not be easily cleaned.
Step 6: Improve
(Brainstorm ideas and research about the topic and what others have done to solve the problem)
- Could you make any changes to the design to fix flaws? Since the roller design didn't work, you decide to go back and try a suspension joint (much like in a bike frame) in each of the top corners of the frame.
- Should you add any features to make it function better? After Toto had a bathroom accident in the car seat during testing, you realize that you needed to use a heavy-duty nylon fabric cover that's removable and washable.
Because you received really positive feedback about your ideas (even if the prototype didn't quite work), you decide to take an iterative design approach and go back to the learn phase to do more research. Another suspension device you recall is a suspension fork of a bicycle, which could be worked into the design for the car seat. After designing another prototype for the base of the car seat, you opt to change the material for the top of the car seat so that it's more durable, can be removed to be cleaned, and is wipeable to make cleaning the car seat less labor-intensive.
Figure 7: Toto in her car seat
Additional Resources to Explore:
Did you know that the engineering design process is used in many domains beyond engineering? Here’s how some students are using the process in their communities.
To learn more about how products are tested by IKEA, check out this video.
Resource Title:
Product Design & the Engineering Design Process
Description:
Explore a real-world design problem that is solved through implementing the engineering design process. Go into the step-by-step details of the engineering design process and the many ways different organizations apply those steps in product design.
Target Grade Level:
Grades 9-12
Discipline or Course (Audience):
CTE: Advanced Manufacturing Systems (VA Course - 8427)
Time Frame:
One 45-minute session
Suggested Grouping:
Individual
Key Vocabulary:
engineering design process, prototype, dynamic, iteration, customer requirements, computer aided drafting (CAD), product specifications, fatigue testing, functionality, consideration, constraint, regulation, compliant
Educator Prep:
No educator preparation is needed.
Recommended Student Background Knowledge and Skills:
No prerequisite skills are needed.
Remote Learning Adaptations:
This resource is appropriate for remote learning; no adaptations or modifications are necessary.
STUDENT CONTENT BELOW THIS LINE
