Biomimicry and Prosthetics: Engineering Design Process
Nature is an excellent source of inspiration for engineers, especially when making objects like prosthetics. In this activity, you will identify examples of biomimicry in the design of manufactured products, then explore using the engineering design process to create products for amputees.
Teacher Tips!
Many activities have a teacher view and a student view, and teachers can switch between those views by clicking the blue button in the upper-right. Students will not see this option - only teacher accounts see both views. The teacher view will start with overview text, if available, to frame the activity and get you started. This view will also have teacher tips and suggested answers to student questions spread throughout the activity. The teacher text interleaved with student-facing text will be in italics and should appear as a different color on your screen. Teacher tips are designed to help you deliver a learning experience that is best suited for your classroom.
Printing Reminder
Whichever view you see on your screen is what will print. You can print this activity without teacher tips by selecting the student view, or print with teacher tips by switching to teacher view. Simply use the standard print function available for your web browser. No extra steps are required.
Resource Title:
Biomimicry and Prosthetics: Engineering Design Process
Description:
Nature is an excellent source of inspiration for engineers, especially when making objects like prosthetics. In this activity, you will identify examples of biomimicry in the design of manufactured products and explore how a biomedical prosthetic manufacturing company uses the engineering design process to create products for amputees. Finally, you'll generate initial concepts for a prosthetic device inspired by designs you find in the natural world.
Target Grade Level:
Grades 9-12
Discipline or Course (Audience):
CTE: Advanced Manufacturing Systems (VA Course - 8427)
Time Frame:
Two 45-minute sessions
Suggested Grouping:
3-4 students
Key Vocabulary:
biomimicry, prostheses, device, biomedical, engineering design process, biomedical, empathy, scale, annotate, constraint, criteria, product requirements document, design proposal
Educator Prep:
In this activity, students will practice the first several steps of the engineering design process by using biomimicry to ideate prosthetic devices for amputees. You may wish to prepare them for seeing videos and images of amputees by having them focus on connecting with the patients' stories and experiences instead of focusing on their injuries.
Students can highlight, copy, and paste any questions or tables into their digital engineering log, and then enter their answers and/or data.
Recommended Student Background Knowledge and Skills:
- Students should have read Article - Product Design & the Engineering Design Process .
Preparation Directions:
- No advanced preparation is needed.
Supporting Resources for Implementation:
- Web Link - NASA BEST Program offers additional guides and resources for educators about the engineering design process.
Remote Learning Adaptations:
- This resource is appropriate for remote learning; no adaptations or modifications are necessary.
Using This Resource with Other Audiences:
- This resource may also be used in Life Sciences courses.
STUDENT CONTENT BELOW THIS LINE
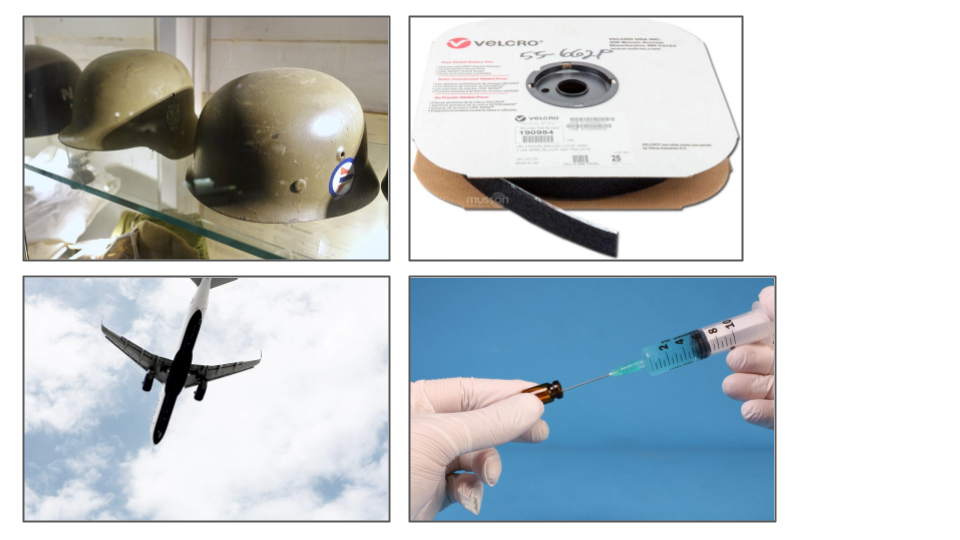
Look at the following images in Figure 1. What do all 4 objects have in common?
Figure 1: Images of a combat helmet, velcro, airplane, and hypodermic needle.
Each of these products was inspired by nature. The design of an airplane was inspired by the shape and structure of a bird's wings. The design of a helmet was inspired by the hard, protective shell of a tortoise. The design of Velcro was inspired by the adherent prickles of a burr. The design of a hypodermic needle is thought to have been inspired by a mosquito.
If you look closely, you'll see that many real-world problems are solved by products that are inspired by nature, both in form and function! This is called biomimicry. Let's break down that word. "Bio" means "life" and "mimicry" means "imitating," so biomimicry means "imitating life."
In this activity, you will look at the designs of various prostheses that were inspired by nature, learn about an individual who is in need of a prosthetic device, and then observe nature to find inspirations for the design of a new prosthetic device. Finally, your observations will inform the design of an innovative idea using the first two phases of the engineering design process.
Materials:
- Device with internet access
- Engineering Journal
Safety Notes:
There are no anticipated physical safety risks associated with this Activity.
Part 1: Introduction to Biomimicry
Begin your exploration of biomimicry by watching Web Link - What is Biomimicry? .
When we look to nature to solve problems through the engineering design process, we can look at all forms of life. Humans, mammals, fish, and even plants. One field where biomimicry is used in nearly every product developed is in the biomedical field of prosthetics. Watch this video to see an example of how one prosthetic designer reflected on his own loss of use of his hands to help in prosthetic design: Web Link - The Project NZ - Change Makers TASKA Prosthetics
Most prostheses are designed to mimic the body part they are replacing. Many innovators, like the designer in this video, strive to build prostheses that are as much like the human body as possible. However, at times, prostheses are inspired by other things in nature. For example, runners who have prosthetic legs may use what is referred to as a "blade." It is modeled after the C-shape of a cheetah's back feet, which helps to propel the runner with each step. Although a prosthetic foot modeled after a human foot is quite functional for many tasks, there may be other designs that are more functional for other tasks, such as sprinting.
Sometimes, a person who needs a prosthetic limb will have more than one device to help them with different functions. Learn more about how the design of a prosthetic leg is based on the function or activity by watching: Web Link - My Prosthetic Leg! Rio's Story .
Complete Table 1 (you can easily copy and paste this table into your digital engineering journal) by identifying which type of prosthesis would be most useful for each activity by placing a check in the box. In the last column, explain why you chose that type. The first row has been completed for you. Please identify and add other activities completed throughout the day or on special occasions to the table. Be sure to complete the table for those activities.
Table 1: Prosthetic Leg Comparison
Activity |
Everyday Leg |
Blade |
Why is this type of prosthesis best for this activity? |
|
Soccer |
✓ |
It is important that Rio have a foot for kicking the ball. |
|
|
Sprinting |
|||
|
Hop-Scotch |
|||
|
Jumping Rope |
|||
|
Climbing a Tree |
|||
|
Walking to School |
|||
|
|
|||
|
|
|||
|
|
|||
|
|
Part 2: Learn Phase
Introduction to Hanger Prosthetics
In Portsmouth, Virginia, there are many military veterans who are treated at the Naval Medical Center. Some of these veterans have experienced devastating injuries that have resulted in the need to amputate a limb. The prosthesis designers at the center use the Learn Phase of the engineering design process to design and create a personalized prosthetic device based upon the veteran's unique story and needs. Watch this video and identify examples of how Hanger Clinic uses empathy in their engineering design process: Web Link - The Hanger Clinic Patient Experience .
Now you'll have a chance to build empathy, too!
Building Empathy
Arrange students into small groups of 3-4 students.
To develop empathy, read through the patient stories on the Hanger website: Web Link - Hanger Clinic Patient Stories .
With your group, select a patient who you would like to help. Read their full story to learn more about their specific prosthetic needs. In your engineering journal, briefly answer these questions.
- What is their prosthetic need?
- What challenges have they faced?
- How could a prosthetic device provide additional function in their lives?
- Are there any constraints or limitations, such as an allergy to certain materials?
Making Observations in Nature
Next, you'll look to nature to be inspired for a possible solution. Individually, visit these animal and habitat cams to observe nature at work: Web Link - Explore LiveCams .
As you are observing the animals, you should note traits, actions, behaviors, interactions, etc. that might inspire biomimicry design for the patient you selected. Questions to ask yourself as you observe the animals include:
- What is the animal doing?
- How is the animal interacting with its environment? (feeding, moving from one place to another, interacting with other animals, etc.)?
- How does this behavior help the animal?
- How could I replicate this function in a prosthesis?
Record your observations and thoughts in your engineering journal.
Brainstorming
Share your observations with your group. Compare how two different animals may have completed the same task in different ways. For example, a crab may have held its food differently from a river otter.
After you have compared your observations, discuss with your group ways in which your selected patient might benefit from nature's design. For example, if the patient is in need of a lower arm prosthetic and would like to have improved function with using utensils when eating, compare the ways in which different animals were able to demonstrate fine motor control and grasping.
Now you're ready to work with your group to generate ideas for possible designs. For 5 minutes, jot down a description or sketch a drawing of at least 4 different ideas for a prosthetic design. Be sure not to evaluate any of the ideas, yet. The goal is to list any idea that comes to mind. The more ideas you generate at this point, the better!
Record your ideas in your engineering journal.
Part 3: Plan Phase
Selecting an Idea
Now that you have a list of ideas, work with your group to narrow your focus. Do the following:
- Take turns selecting an idea from the list.
- When it's your turn, select an idea (other than your own!) and add a "Yes, and..." statement to build upon the idea. This might be a suggestion of how to improve the product, an additional feature, or a recommendation for how it can be manufactured.
- Give others in your group an opportunity to add their own "Yes, and..." ideas.
- After each member of your group has selected an idea and has completed the "Yes, and..." process, discuss which specific idea you would like to develop. Remember, you can also blend two or more ideas into a totally new design, as well!
Record your selected design idea in your engineering notebook. Be sure to include a written description of your design as well as any notes about why you chose this particular design.
Creating the Design
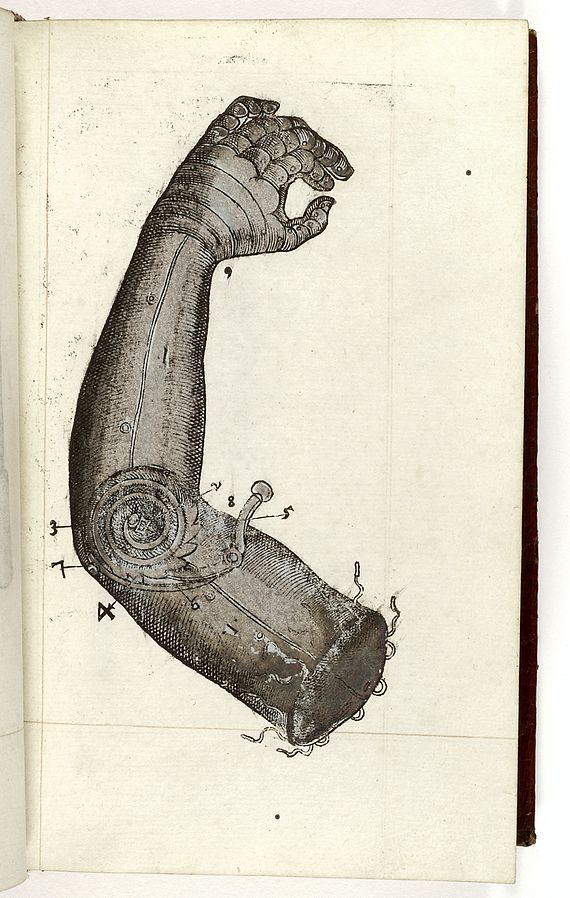
Figure 2: Illustration of Mechanical Arm
Work with your group to create a sketch detailing the initial concept design of the prosthetic device. Be sure to:
- Draw it to scale
- Annotate your sketch
- show measurements
- label the parts
- identify moving parts
- identify possible construction materials
- List any design constraints and criteria you identified during the Learn Phase. This list will be the beginning of a product requirements document.
All of these pieces are important parts of the manufacturing design proposal!
Reflect and Apply:
Take a look at the historical image in the "Creating the Design" section, and then watch this video about how innovation and advanced manufacturing are poised to dramatically change the prosthetic manufacturing industry, making prosthetic limbs more affordable and responsive: Web Link - 3D printed, mind-controlled prosthetics are here .
Answer these questions:
- How do you think prosthetic design has changed over time?
- In what ways have changes in the engineering design process improved product design and manufacturing?
- How would your design be improved if you used CAD software to sketch the design or a 3D printer to manufacture it?
- Other than the biomedical industry, in what other industries could biomimicry aid in product design?
Extension
- If you have access to CAD software, become familiar with its features by recreating your prosthetic device sketch using the software.
- Career Pathway: Watch this video to learn more about the pathway to becoming a prosthetist or prosthetic technician. Many of the skills you'll learn in this course are creating a foundation for a career in designing and building prosthetics! Web Link - Orthotists and Prosthetists Career Video


